> ## Documentation Index
> Fetch the complete documentation index at: https://docs.loqate.com/llms.txt
> Use this file to discover all available pages before exploring further.
# How to Integrate the Loqate .NET API using Microsoft Visual Studio
1. Launch Microsoft Visual Studio (the following screenshots are taken from Microsoft Visual Studio 2005).
2. Select File > New > Project
3. The New Project wizard will open. Highlight "Windows" under the Visual C# node on the left under Project types and "Console Application" under Templates on the right as seen below.
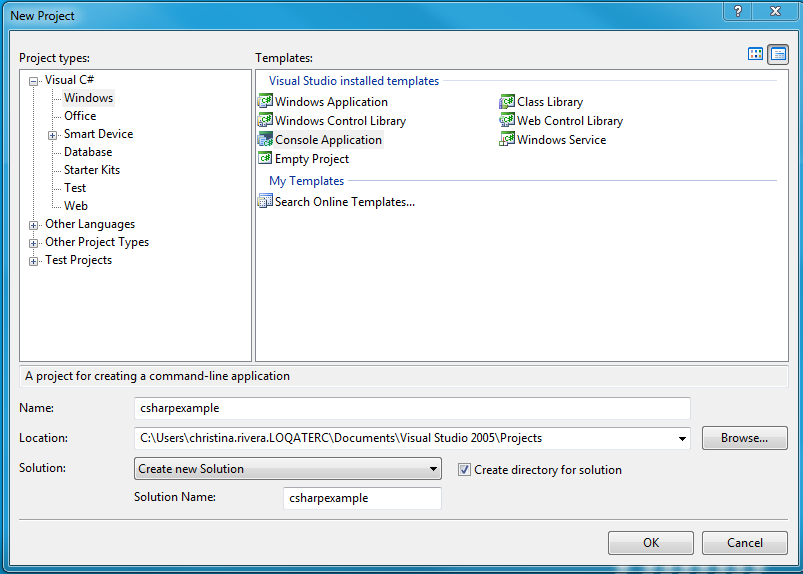 4. Enter the name for your project in the Name field and select OK (this will automatically populate the Solution name with the same name). For this example, we will use "csharpexample."
5. The Loqate .NET API is referenced through the `lqtnetc.dll` file so we will add this reference. Highlight and right-click the "csharpexample" project in the Explorer window. Select "Add Reference..."
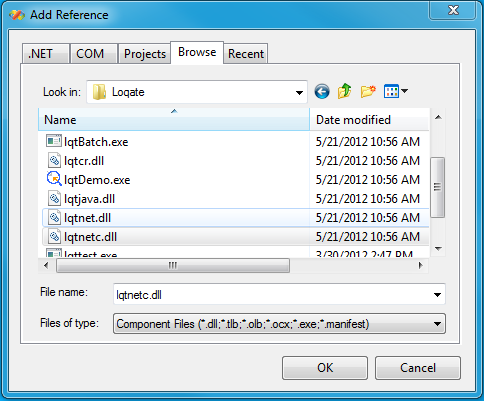
6. The Add Reference window will open. Select the Browse tab and browse to the directory where your Loqate software is installed. Select the `lqtnetc.dll` file and select OK as seen below.
4. Enter the name for your project in the Name field and select OK (this will automatically populate the Solution name with the same name). For this example, we will use "csharpexample."
5. The Loqate .NET API is referenced through the `lqtnetc.dll` file so we will add this reference. Highlight and right-click the "csharpexample" project in the Explorer window. Select "Add Reference..."
6. The Add Reference window will open. Select the Browse tab and browse to the directory where your Loqate software is installed. Select the `lqtnetc.dll` file and select OK as seen below.
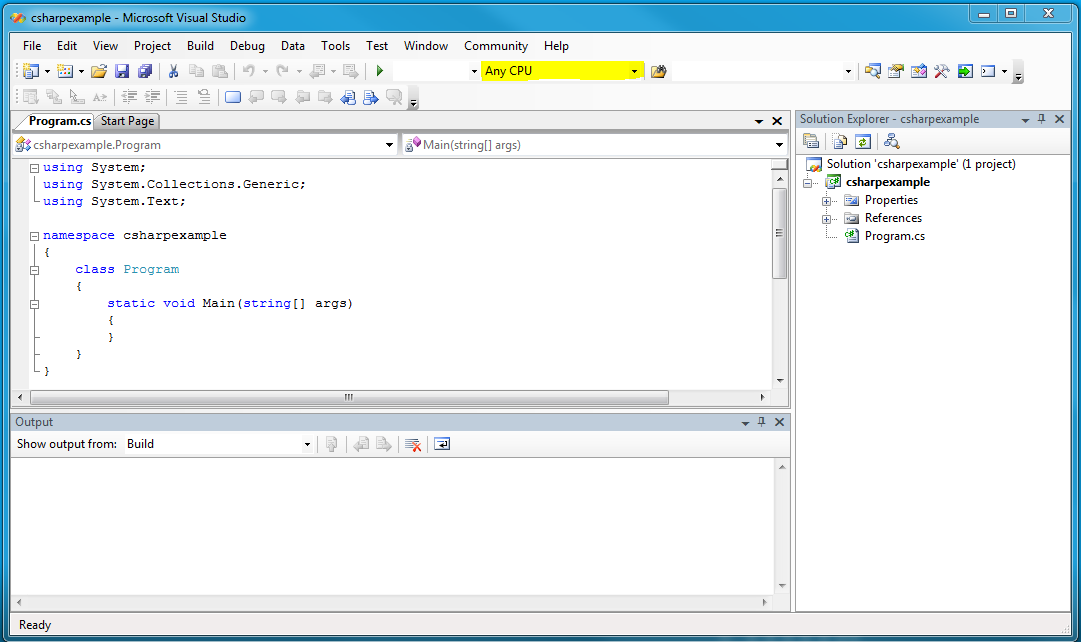
 7. Next, we will use the Configuration Manager to make sure it is configured properly to build your project. Select the pull-down menu highlighted below and select Configuration Manager.
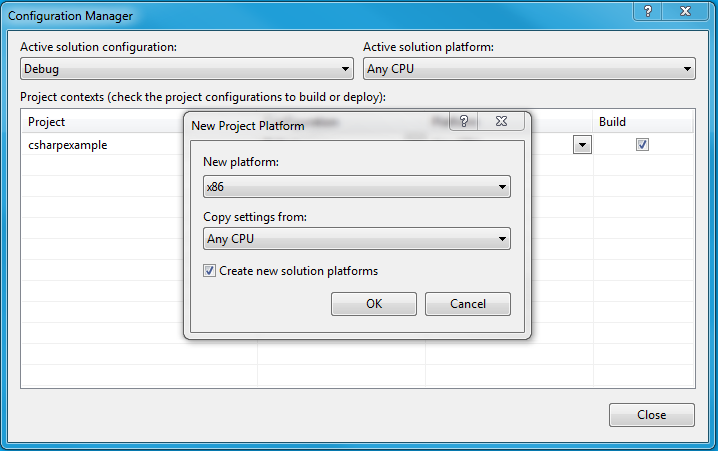
 8. The Configuration Manager will open. In the "Project contexts" section, under Platform, select ``. The New Project Platform window will open as shown below. Select `x86` or `x64` in the New platform drop-down menu, depending if you have 32-bit or 64-bit. You can leave the default option, "Any CPU" selected for the Copy settings from options and leave the "Create new solution platforms" box checked and hit OK.
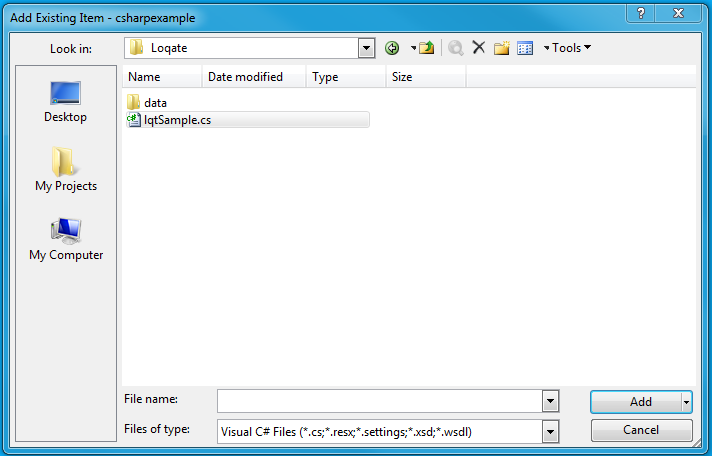
 9. Now we will add the C# sample file. Highlight and right-click the "csharpexample" project in the Explorer window and select Add > "Existing Item..." Browse to the directory where your Loqate software is installed and select the `lqtSample.cs` file and hit Add. You may have a default `Program.cs` file which had already been added when you first created your project. Go ahead and delete this file so you should now only have the `lqtSample.cs` file listed under your project.
 10. Now we will build your solution. Highlight and right-click the "csharpexample" project in the Explorer window and select Build. Or you can select Build > Build Solution from the top. At the bottom will be the Output window where you will see if the build was successful or not.
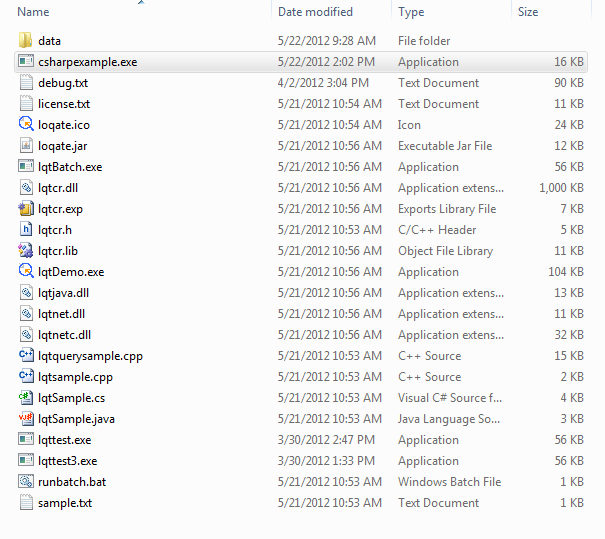
11. Additionally in the Output window, you will see which directory the executable was created in. Browse to this directory and copy the `csharpexample.exe` file to your Loqate install directory. Your Loqate install directory should now have the following contents:
10. Now we will build your solution. Highlight and right-click the "csharpexample" project in the Explorer window and select Build. Or you can select Build > Build Solution from the top. At the bottom will be the Output window where you will see if the build was successful or not.
11. Additionally in the Output window, you will see which directory the executable was created in. Browse to this directory and copy the `csharpexample.exe` file to your Loqate install directory. Your Loqate install directory should now have the following contents:
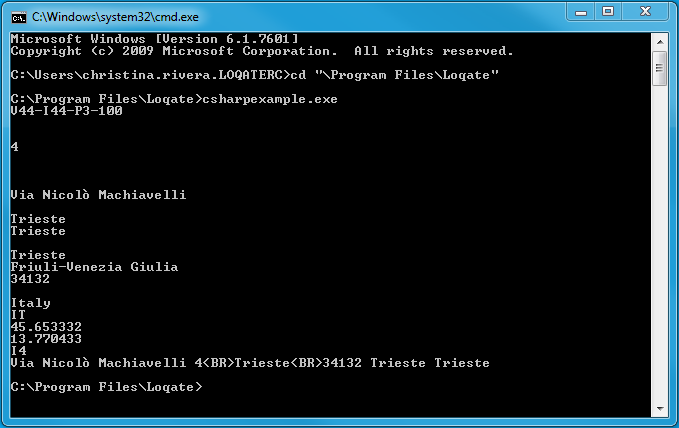
 12. Open a command window and cd to your Loqate install directory. Run the `csharpexample.exe` file and you will see the output of the single record as seen below.