Download the Microsoft Dynamics 365 plugin
Prerequisites
In order to install and configure the Loqate Dynamics 365 integration you will need the following:- The Loqate solution zip file
- A Loqate API key (for more information see our Creating API Keys page)
- Administrative access to your Dynamics 365 environment
Installation
Installing the Loqate Dynamics 365 integration involves the following steps:- Import the solution
- Configure your forms to use Loqate controls (for each form you can add controls for Email Verification, Phone Verification and Address Search)
Importing the solution
- From your Dynamics 365 environment select Settings > Advanced Settings. This will open your Business Settings in a new tab
- From the Customisation section of the menu, select Solutions
- Select Import Solution
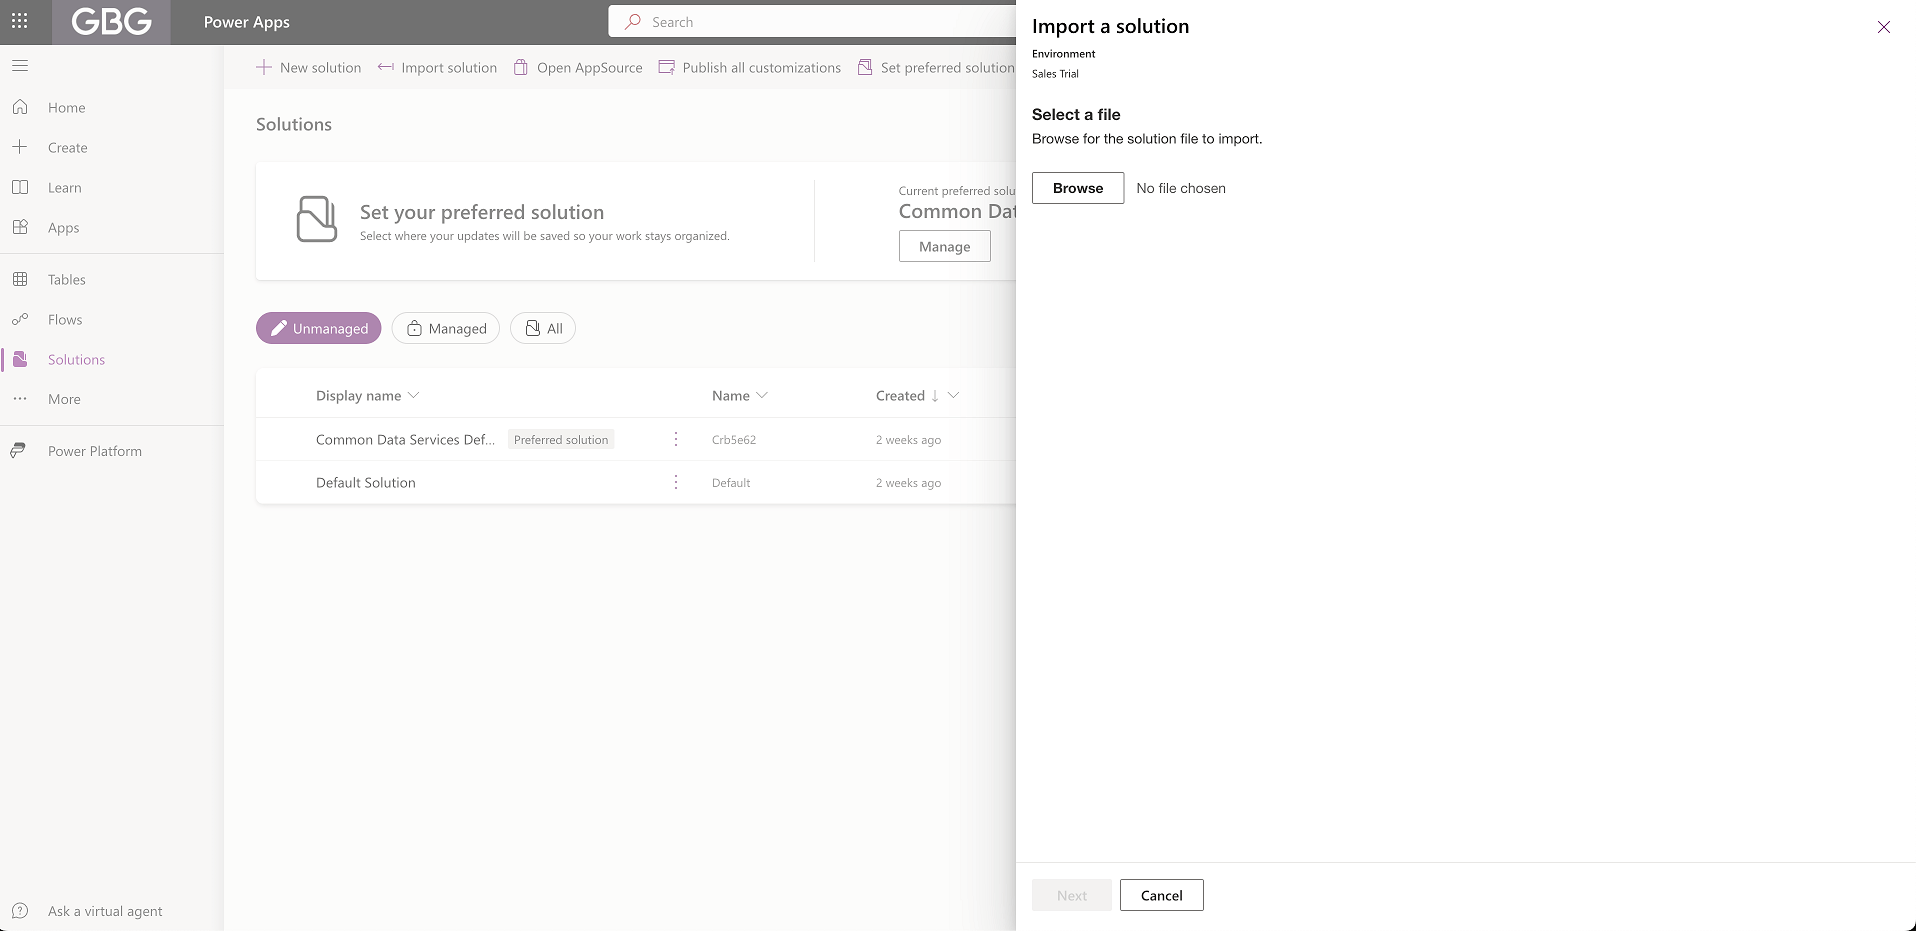
- A menu will appear allowing you to browse for the Loqate solution zip file - select this and click Next
- The version of the solution you’re importing will display, and you will see a warning if you’re updating an existing installation to a new version, or installing a version you’ve already installed previously
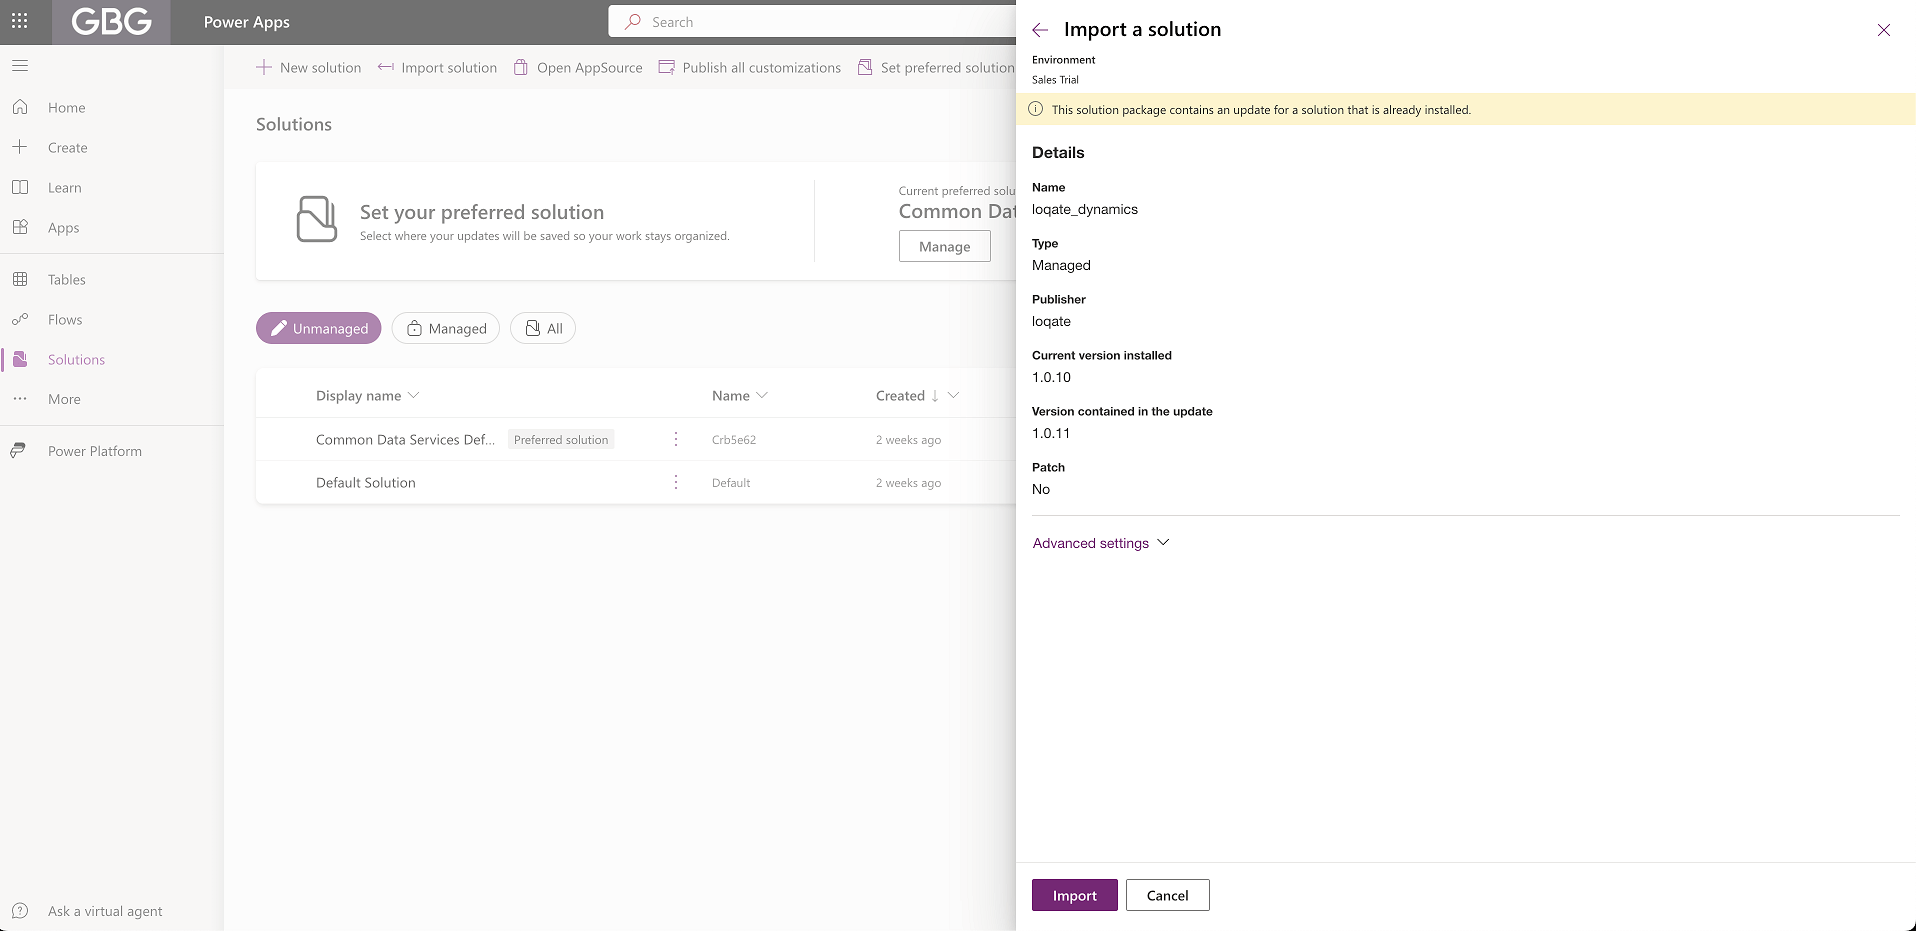
- Select Import
- A bar will appear at the top of the page reading ‘Currently importing solution “loqate_dynamics”.’
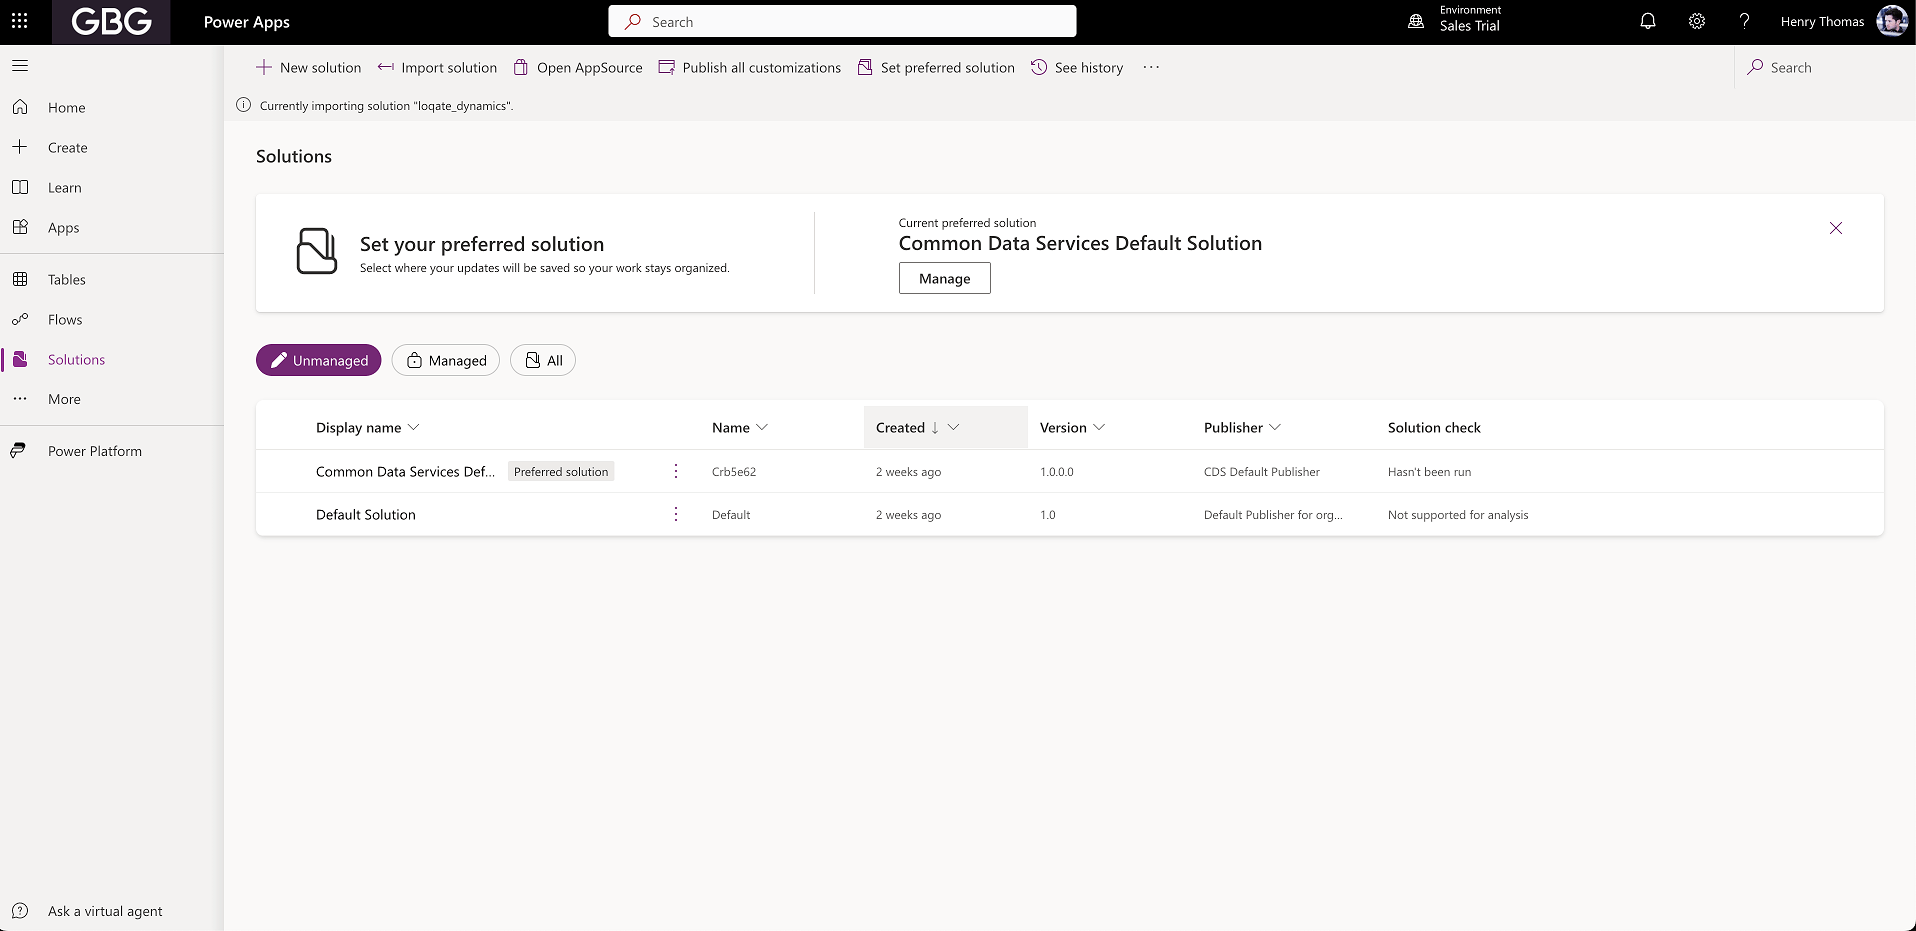
- If you need to navigate away while this is importing, you can - the process will run in the background
- Once the import is complete, the progress bar will turn green and read ‘Solution “loqate_dynamics” imported successfully’

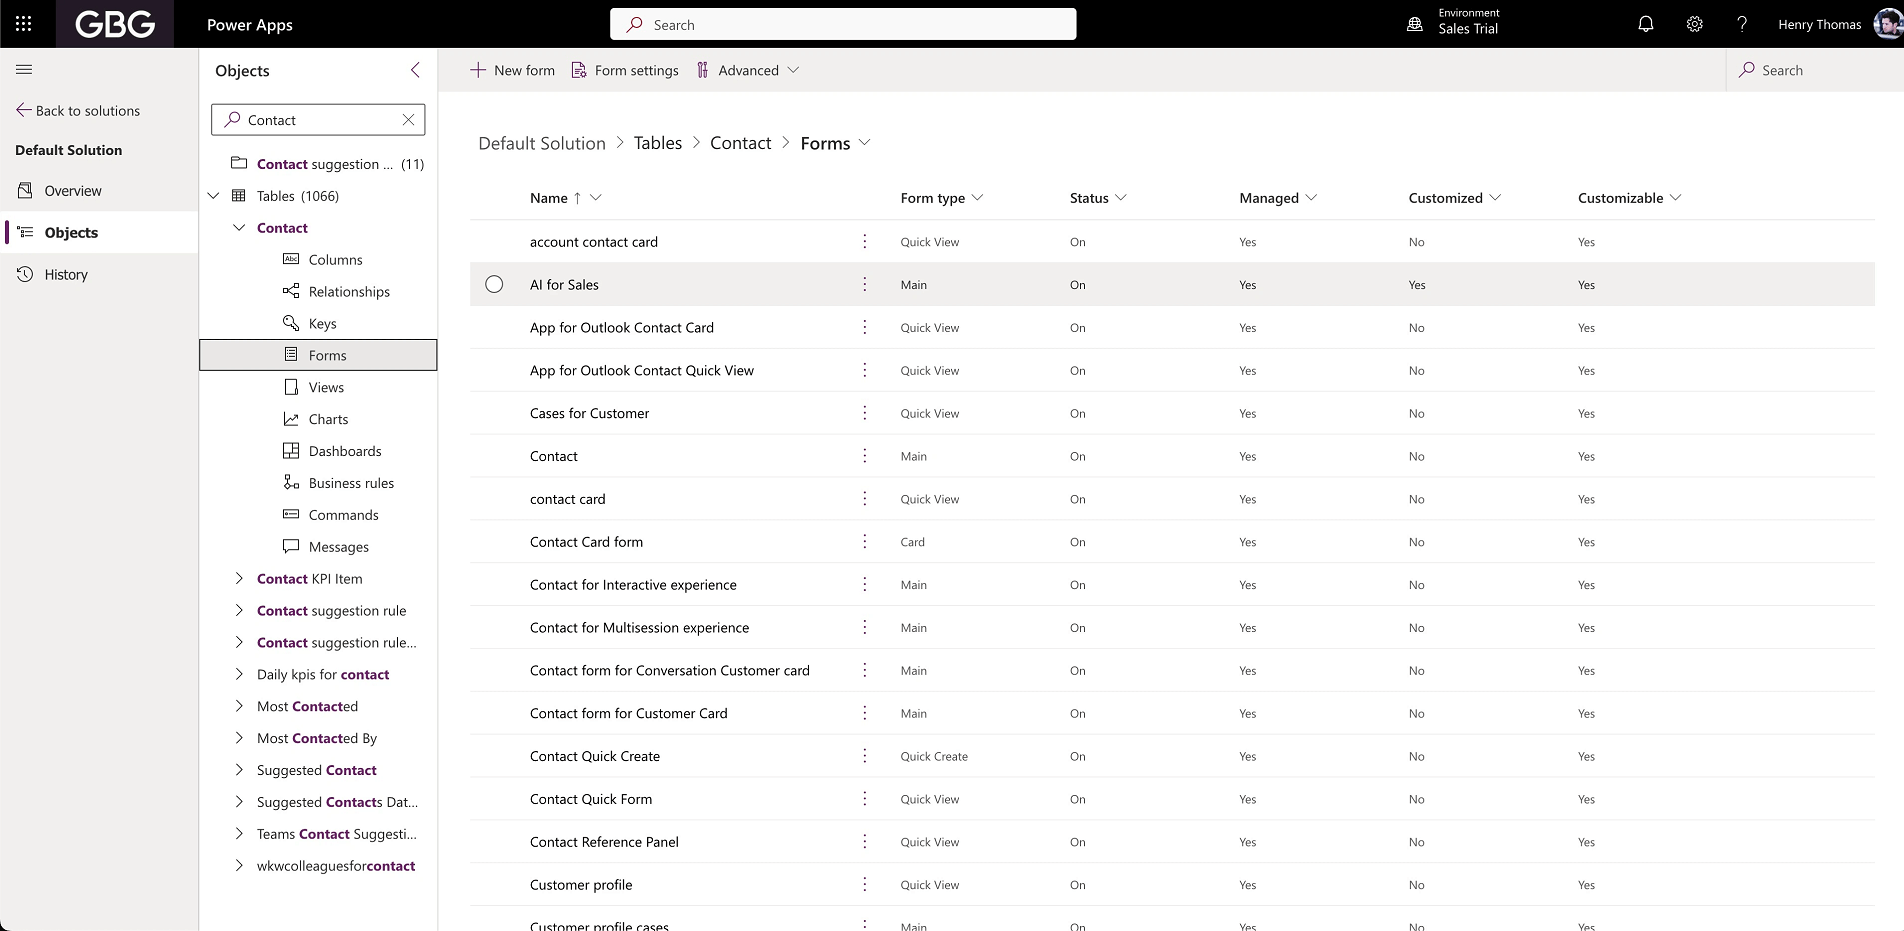
Configuring your forms
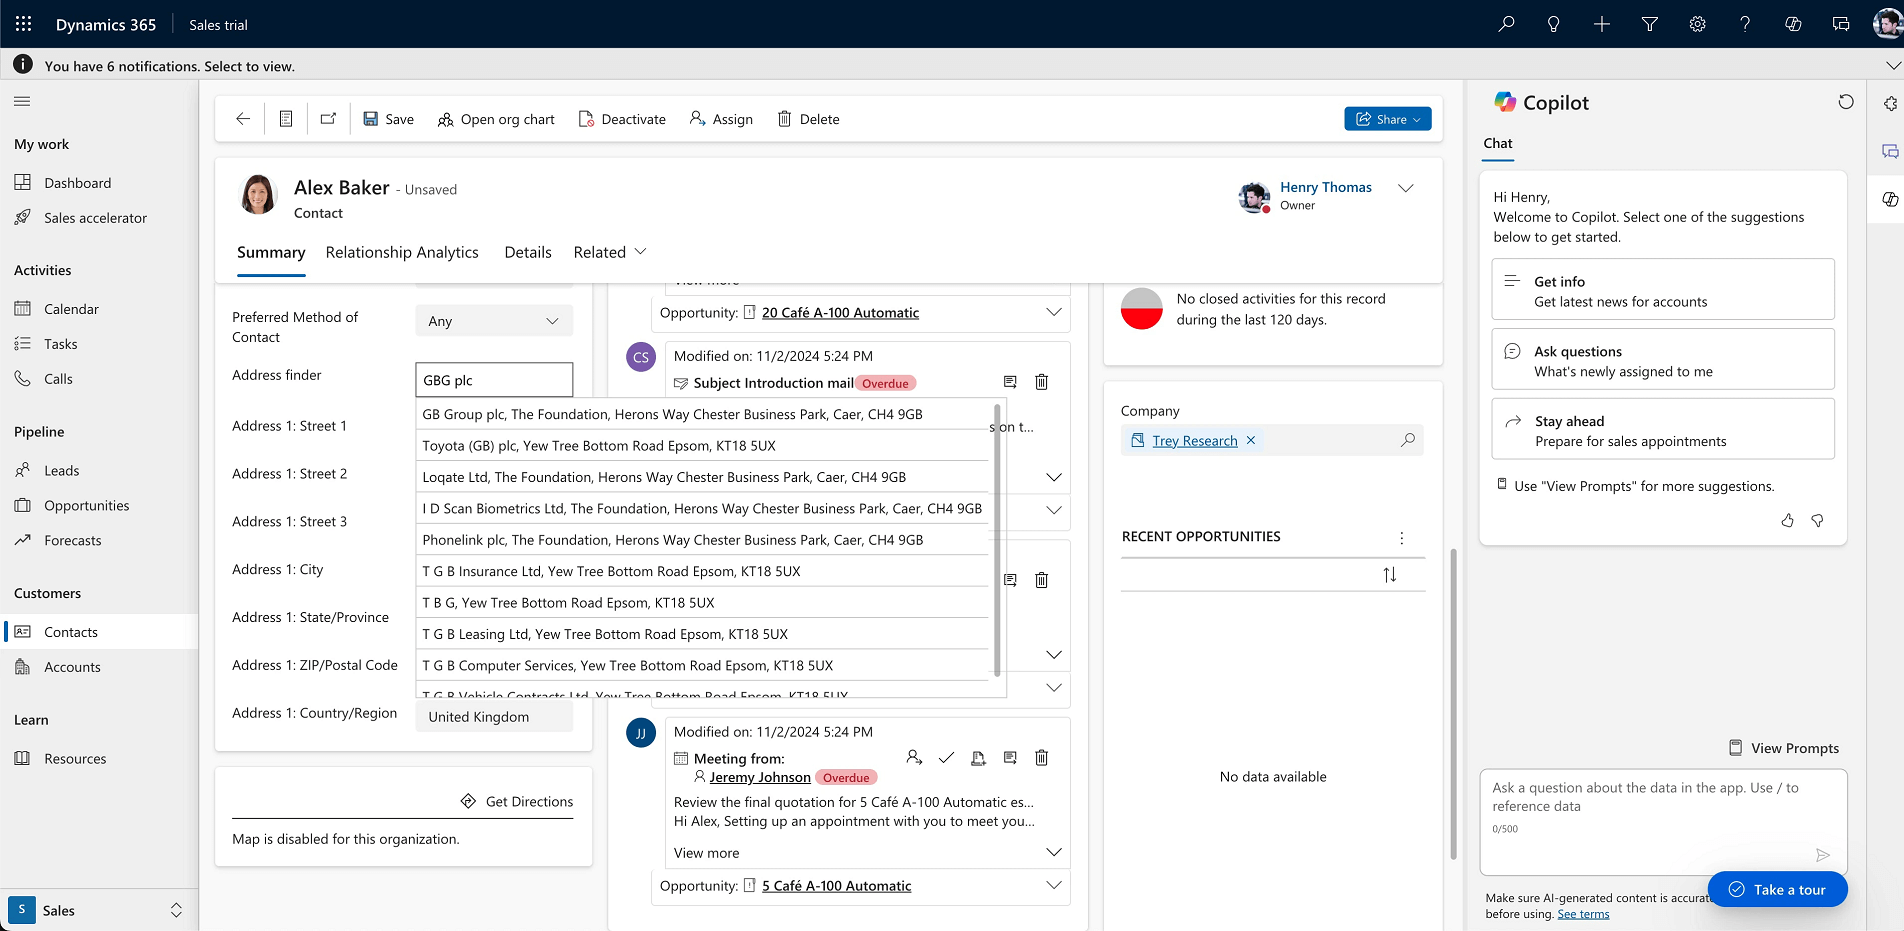
With the solution imported into your environment, the next step is to configure your forms to use Loqate controls. There is a control for each of the services available in the solution (you can click the links below to go to the relevant section of this document): The configuration method is similar for each control, although the specific configuration options are different depending on which control you’re using. For this example we’re going to add the controls to the standard Customer Contact form, which looks like this: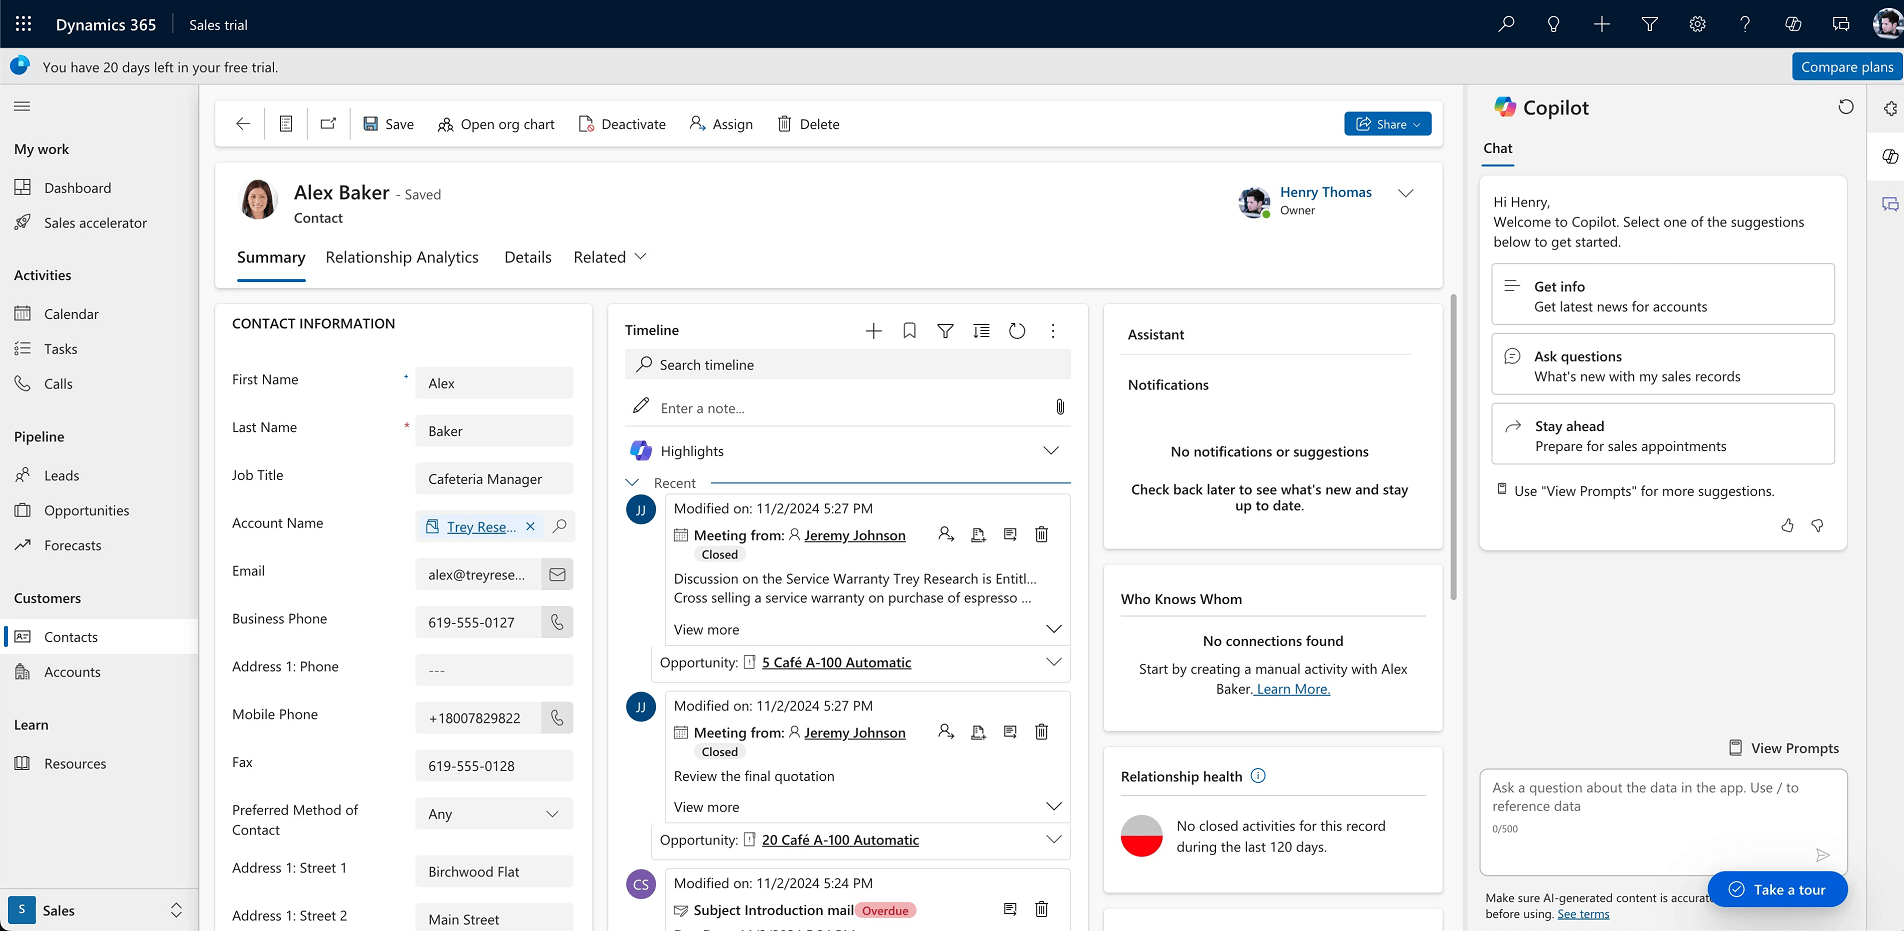
- From your Dynamics 365 environment select Settings > Advanced Settings. This will open your Business Settings in a new tab
- From the Customisation section of the menu, select Customizations > Customise the system
- Select the form you want to update (for this example we’re editing “AI for sales”) to open the form editor
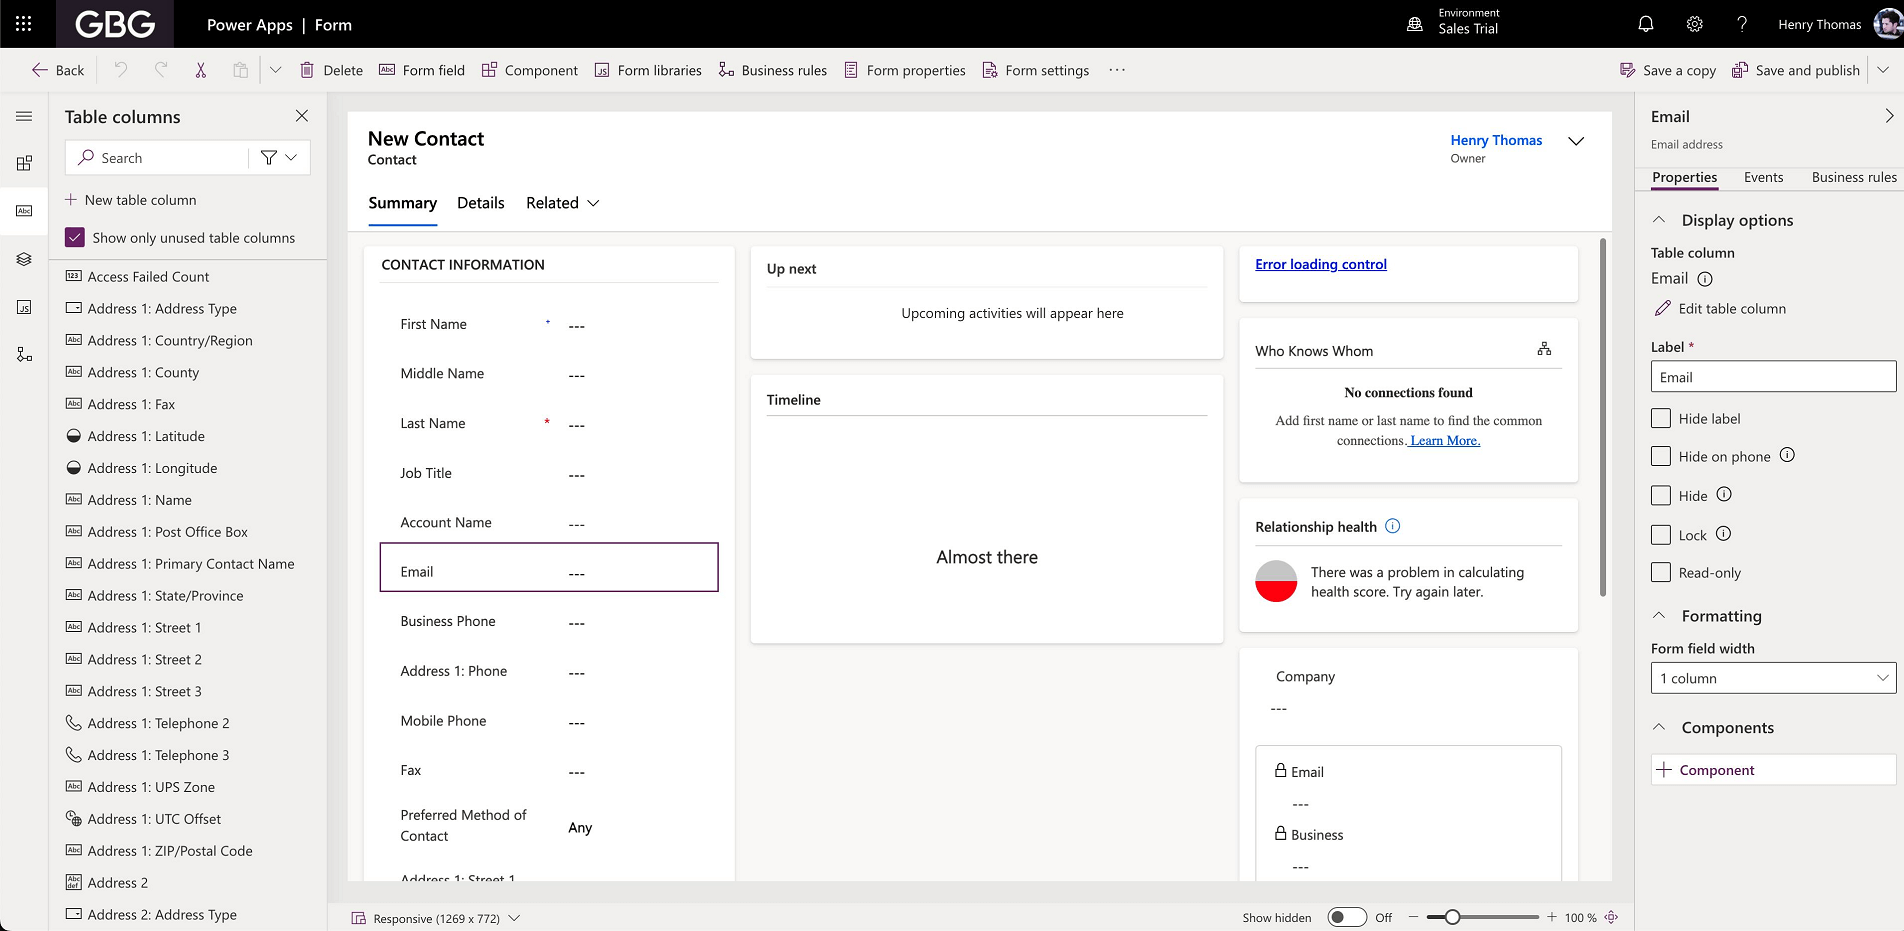
- Select the Email field in your form to open its Properties menu on the right-hand side of the screen
- Expand the Components section, and select the + Component button
- If you’ve installed or used Loqate before, the Email control may already be in the quick selection menu. If this is the first time you’re installing Loqate, however, you’ll likely need to look the component up
- To do this, select Get more components
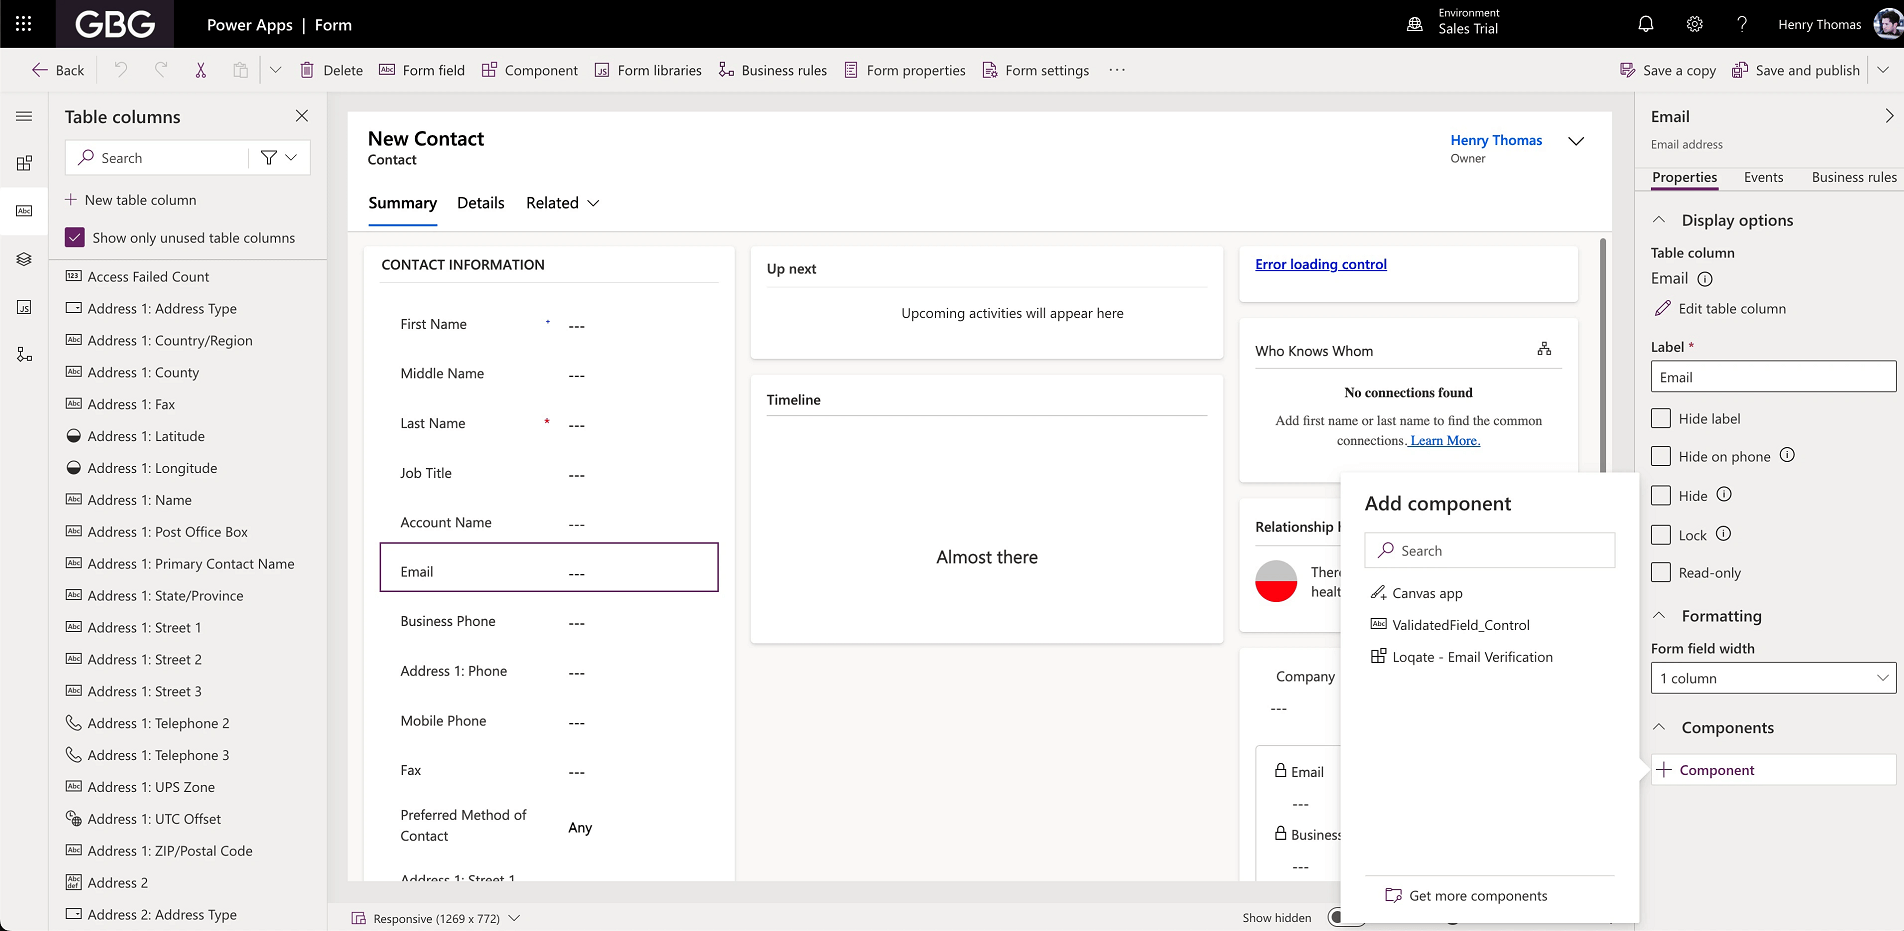
- Use the search bar to search for “Loqate”. The control is called Loqate - Email Verification
- Once you have selected the control you will be prompted for some configuration information
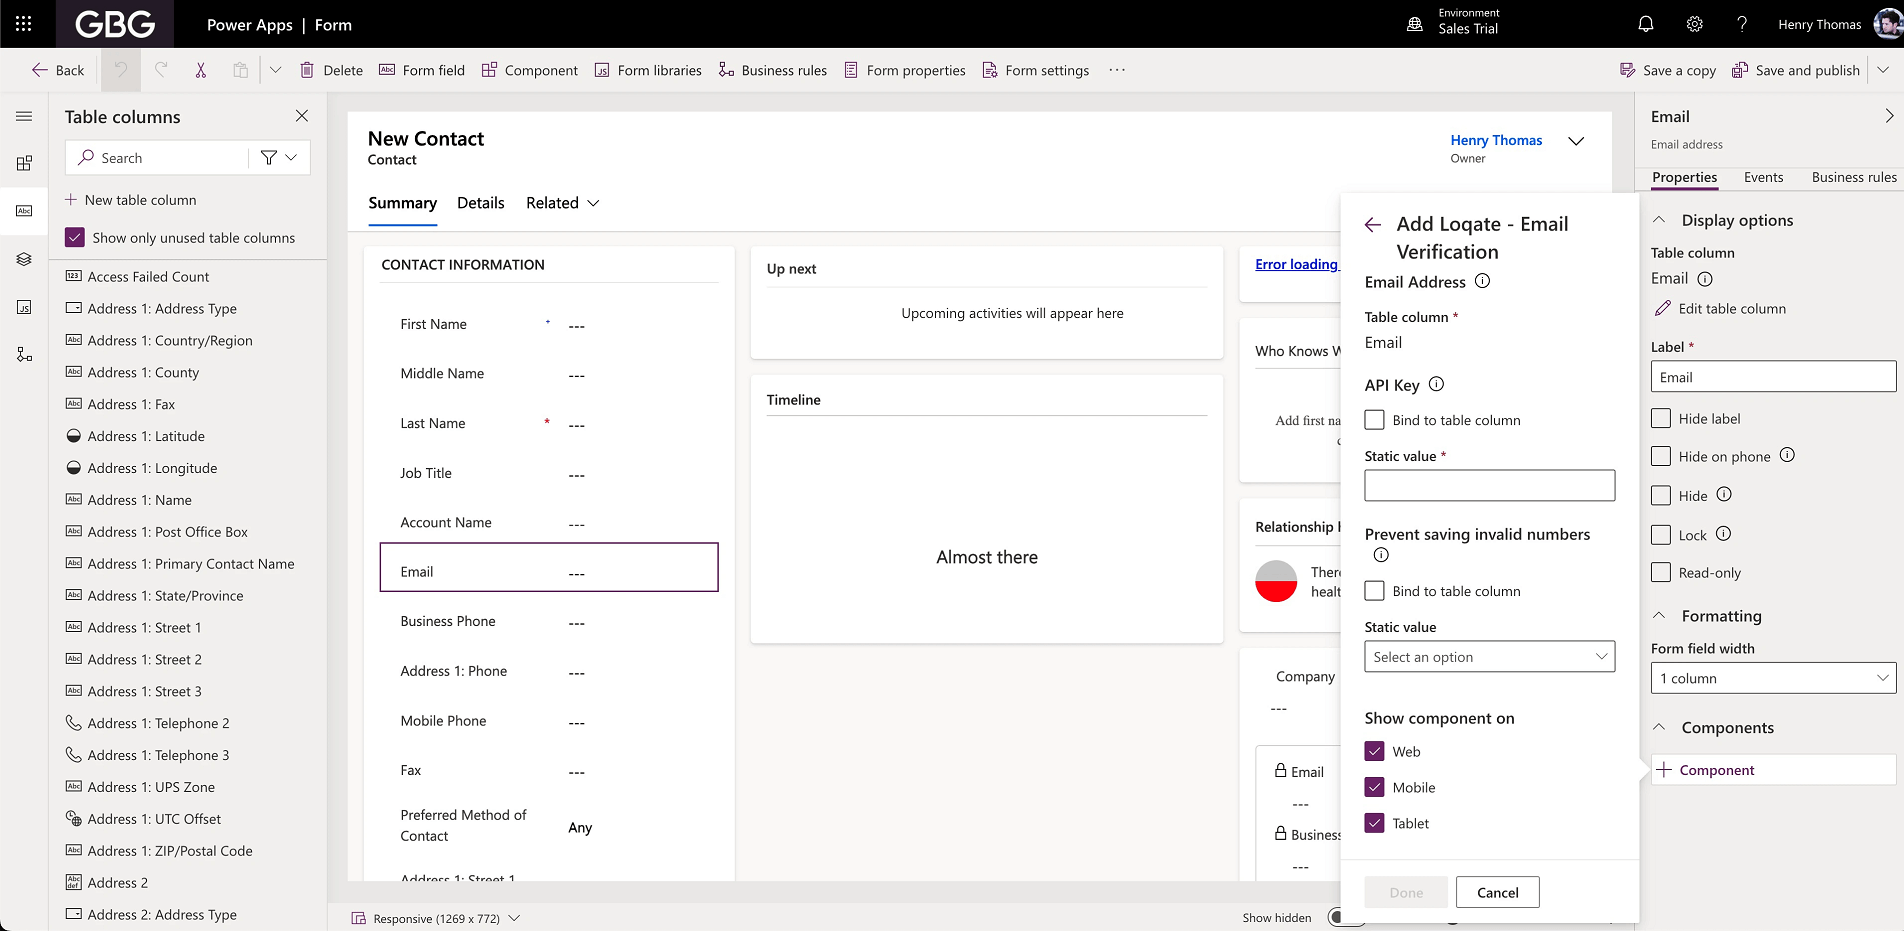
- The options available for Email Verification are:
- API Key: your API key for accessing Loqate services (this is a required field)
- Prevent saving invalid emails: with this set to True, when an email is verified and found to be invalid a user will not be able to save the form until they have entered and validated a correct email address
- With those settings entered, select Done to set the component
- You should now see the component update in the preview
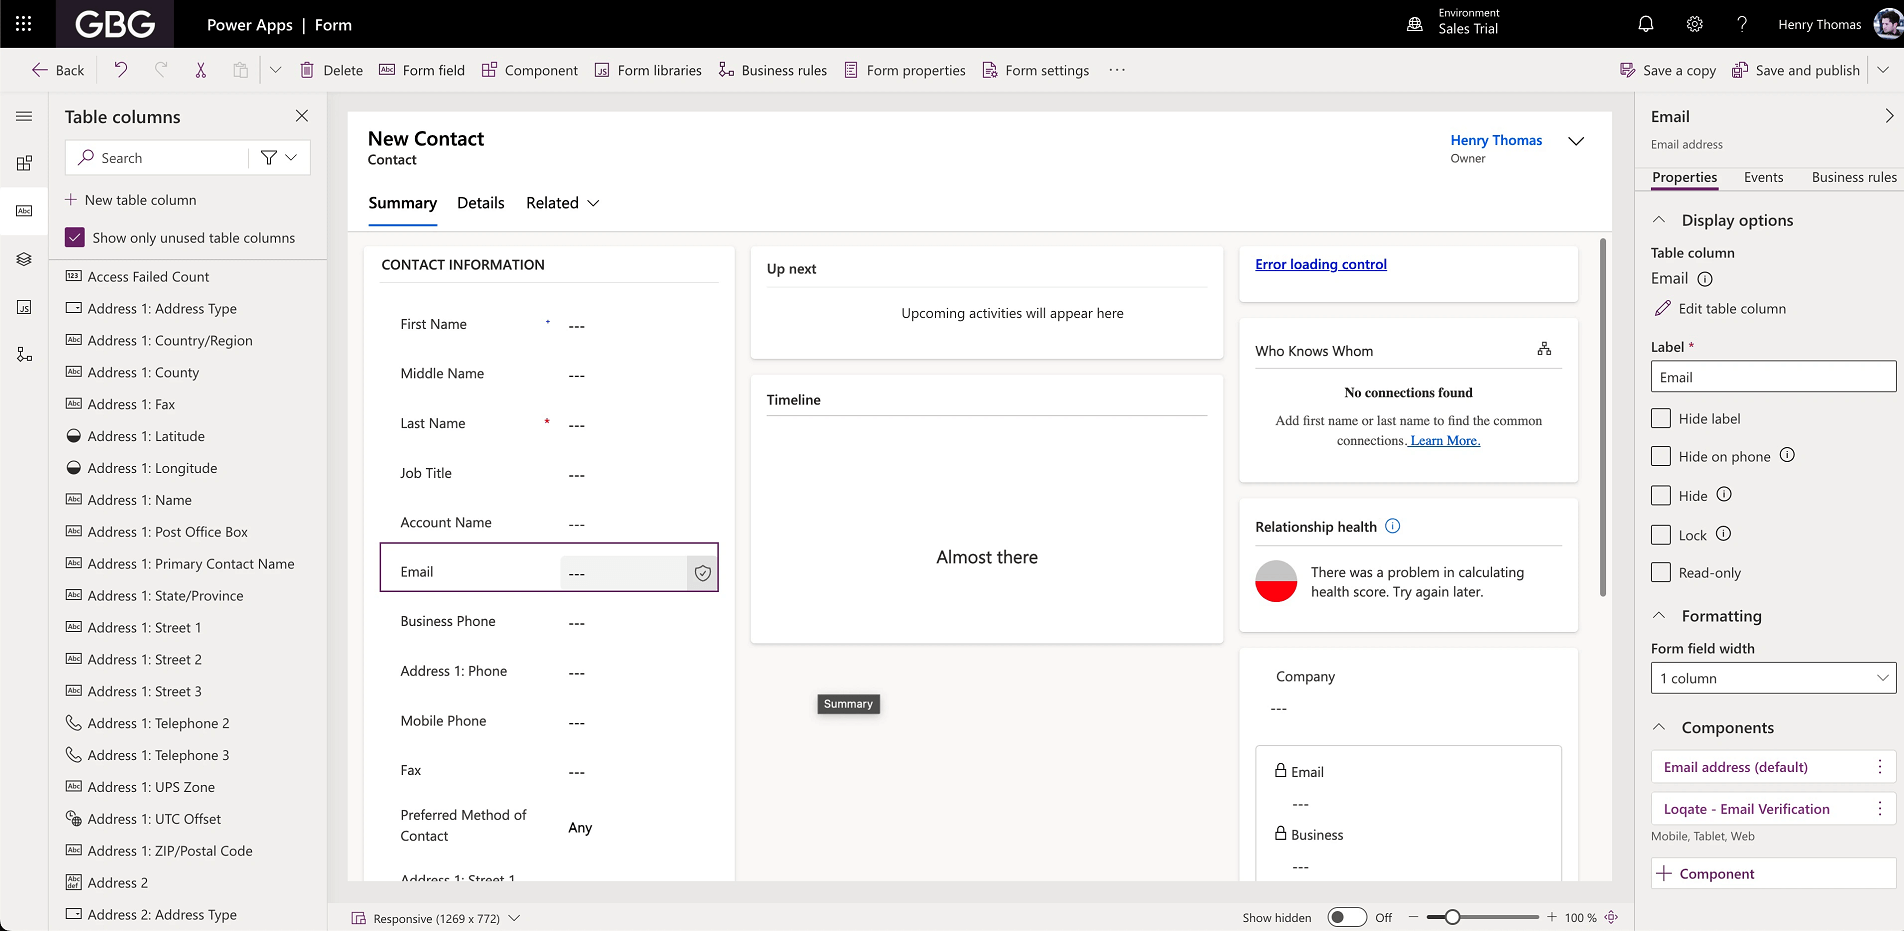
- Select Save and Publish to update your form and publish the control. Depending on your form setup, this can take a little time.
Phone
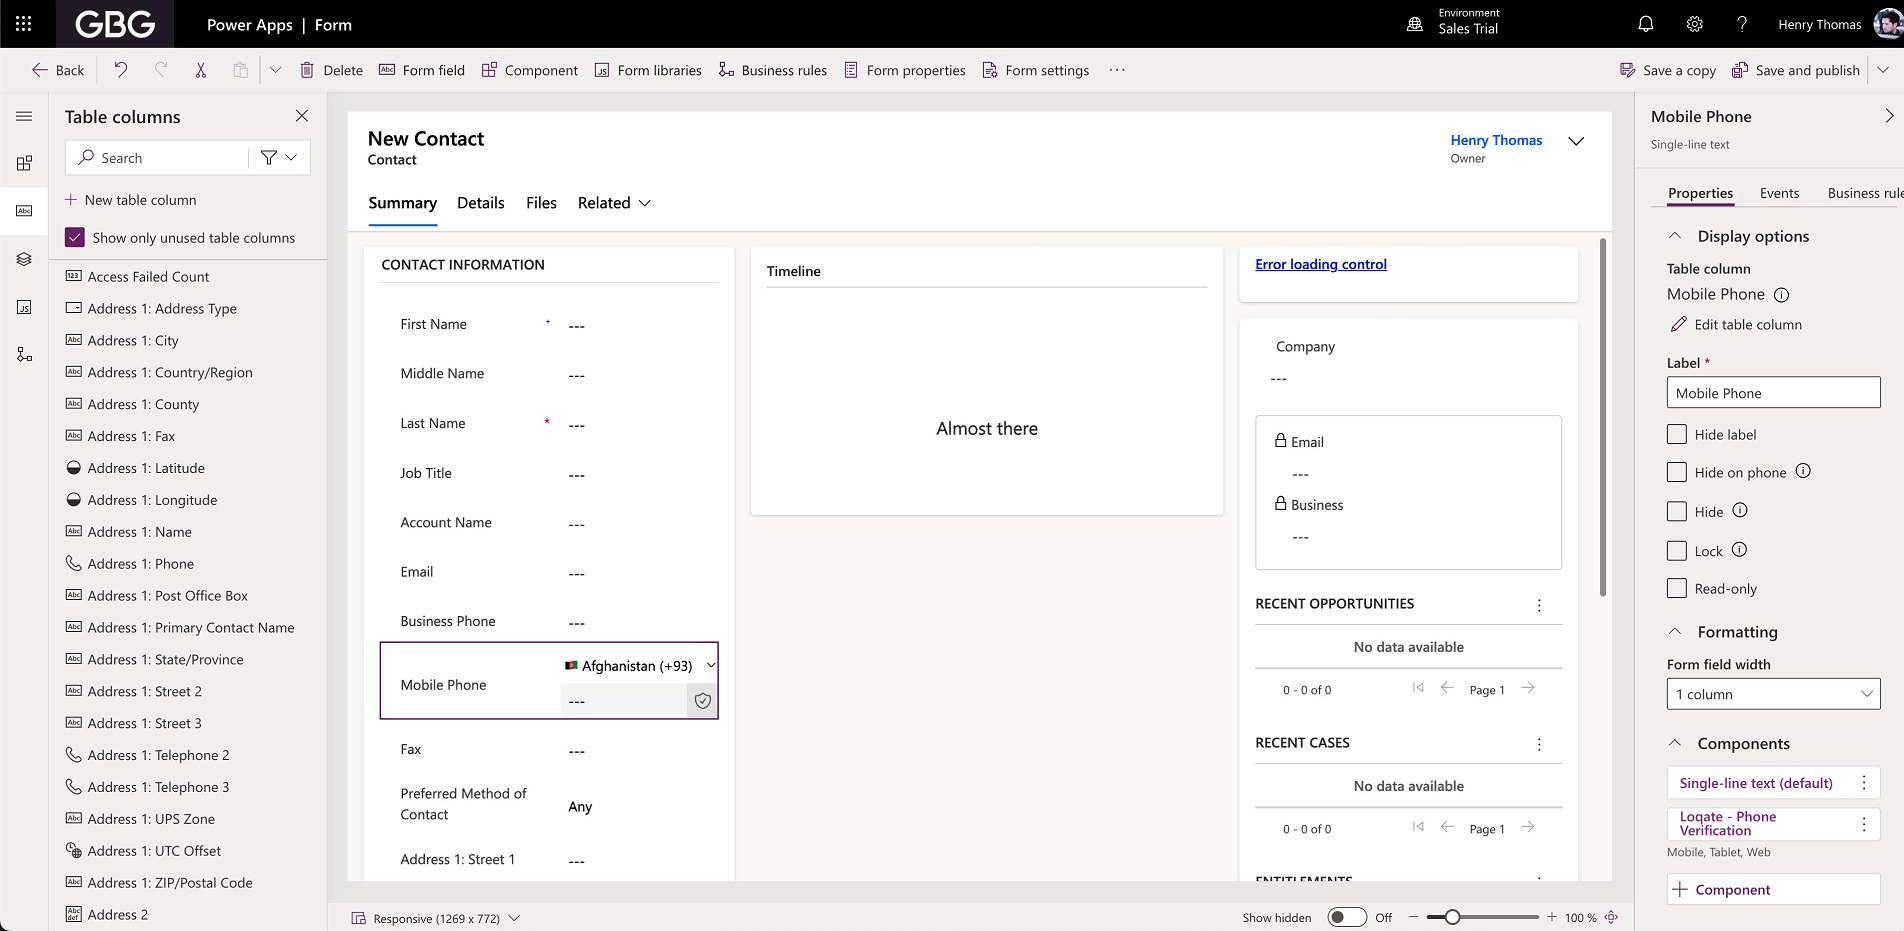
Installing the phone control is a similar process to the Email control, just with a couple of extra options.- Go to the Form editor for your form
- Select the Phone field to open its Properties menu
- Expand the Components section, and select the + Component button
- Find the Loqate - Phone Verification control and select it
- Here are the options for this control:
- API Key: your API key for accessing Loqate services (this is a required field)
- Prevent saving invalid numbers: with this set to True, when a number is verified and found to be invalid a user will not be able to save the form until they have entered and validated a correct number
- Pass if Maybe: it’s possible for the Phone Validation service to respond with a status of “Maybe”. This option will allow you to select how you want the control to behave in this scenario: setting this to True will mean the control returns a positive result for a maybe, while False will result in a negative response
- Use client IP to set initial country: sets whether the plugin should use the client’s IP address to automatically detect and set the initial country for phone validation. If enabled, the country will be set based on the client’s IP address; if disabled, the initial country specified below will be used.
- Initial Country (ISO2): the initial country to use for the phone number validation (e.g., ‘US’, ‘GB’). This will be used if the client IP is not available, or if the option above is set to False
- When you have set your options, select Done
- You should see the control update in the preview window
- Select Save and Publish to update your form and publish the control. Depending on your form setup, this can take a little time
Address
Installing the address control is a similar process to the Email and Phone controls, but might require an extra step or two. NOTE: in the Form editor for your form, you might notice that the address fields are included as a set, and you’re not able to select them individually: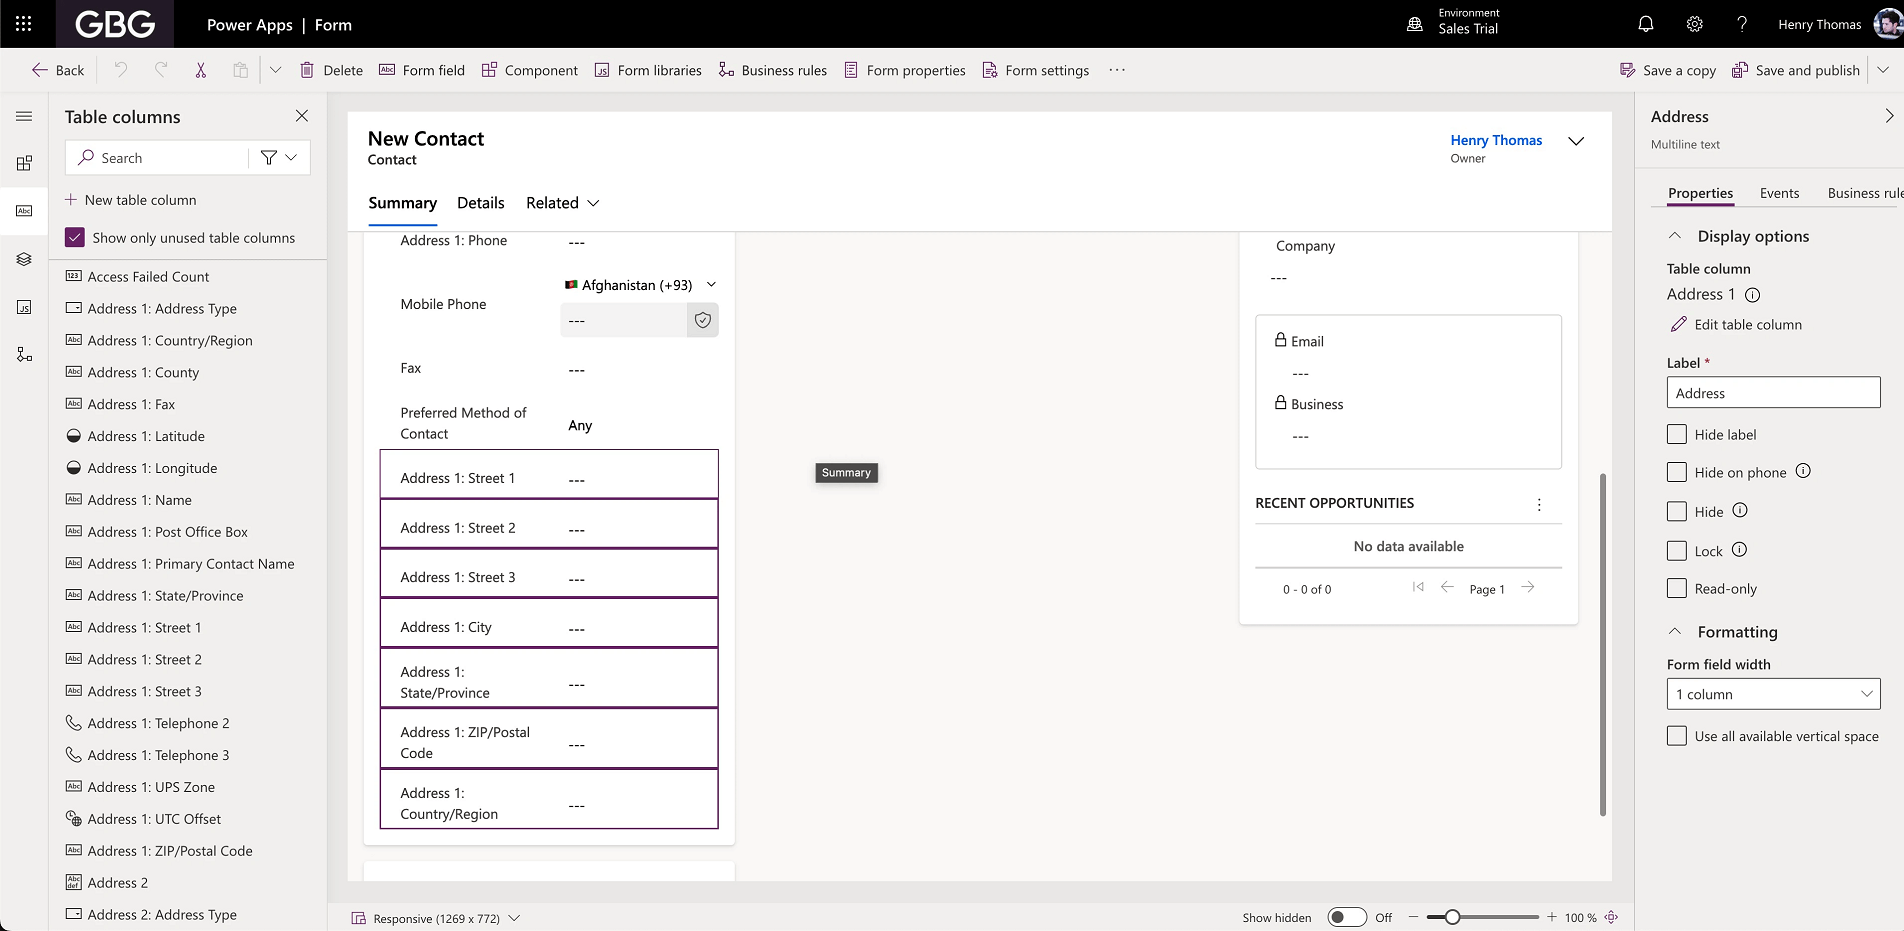
- You could remove this part of the form and add the other parts individually
- Or you could add another separate field to handle the address lookup
- Drag the Address 1: Street 1 field from the column list on the left, and drop it above the existing address fields
- Select the new field to open its Properties menu, and set its Label to “Address Finder” (or another description of your choice)
- Expand the Components section, and select the + Component button
- Find and select the Loqate - Address Search control
- Here are the available options for this control:
- API Key: your API key for accessing Loqate services (this is a required field)
- Input fields: the set of options from ‘Origin’ down to ‘Field20Format’ all relate to Loqate input fields, and how you want to use them. You can find more information on what these options do in the Request parameters section of our Capture Find API page
- Address: the set of options from ‘Address Line 1’ onwards allow you to set where each different address item is inputted into your form when an address is returned. For each option in this section that you want to return, make sure you select the relevant field from your form that you want the address item to map to (note that if you don’t want to return a particular field, you don’t need to map to it)

- When you have set your options, select Done
- Select Save and Publish to update your form and publish the control. Depending on your form setup, this can take a little time.