Download from the Shopify App Store
About the Loqate Shopify Plus Integration
Prerequisites
Before you start installing and setting up the Loqate Shopify Plus Integration, you will need the following:- A live Shopify Plus account
- A live Loqate account (available at account.loqate.com)
- A new Loqate API key (see the API keys section below for more information on this)
API keys
You’ll need a new Loqate API key, dedicated to this service (our Creating API Keys page has lots of information about how to set one up, and what to consider when you’re doing that). We recommend you create a generic API key, but any key will work. Note that you can use both Address Capture and Address Verify with a single API key. For information about how to ensure your Loqate integration is as secure as possible, see our API Security page.Installation
There are a few quick steps to get the Loqate Shopify Plus Integration up and running:- Install and configure the Loqate app
- Enable Address Capture, Address Verify and Email Validation
- Recommended - include company name
Installing and configuring the Loqate app
The initial setup will add the Loqate app to your Shopify store, at which point Address Capture will be enabled by default. You can then also enable Address Verify and/or Email Validation. First, install the Loqate app from the Shopify App Store (see the Shopify app installation instructions for more details). Once that is done:- You should automatically be taken to the Admin section for your new Loqate app
- If not, go to accounts.shopify.com, select the Your store option, then select the Loqate app on the left-hand side of the screen to open it
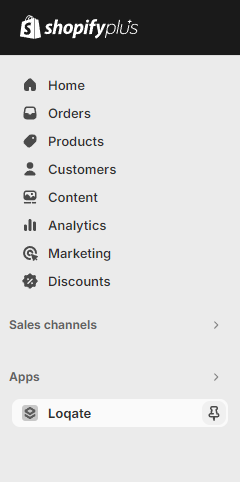
- Copy and paste your Loqate API key in to the API Key field on this screen, then click the Save button:
 With that done, you can add one or more of the Loqate services to your store using the steps below.
Enabling Loqate services
- Enabling Address Capture
- Enabling Address Verify
- Enabling Email Validation
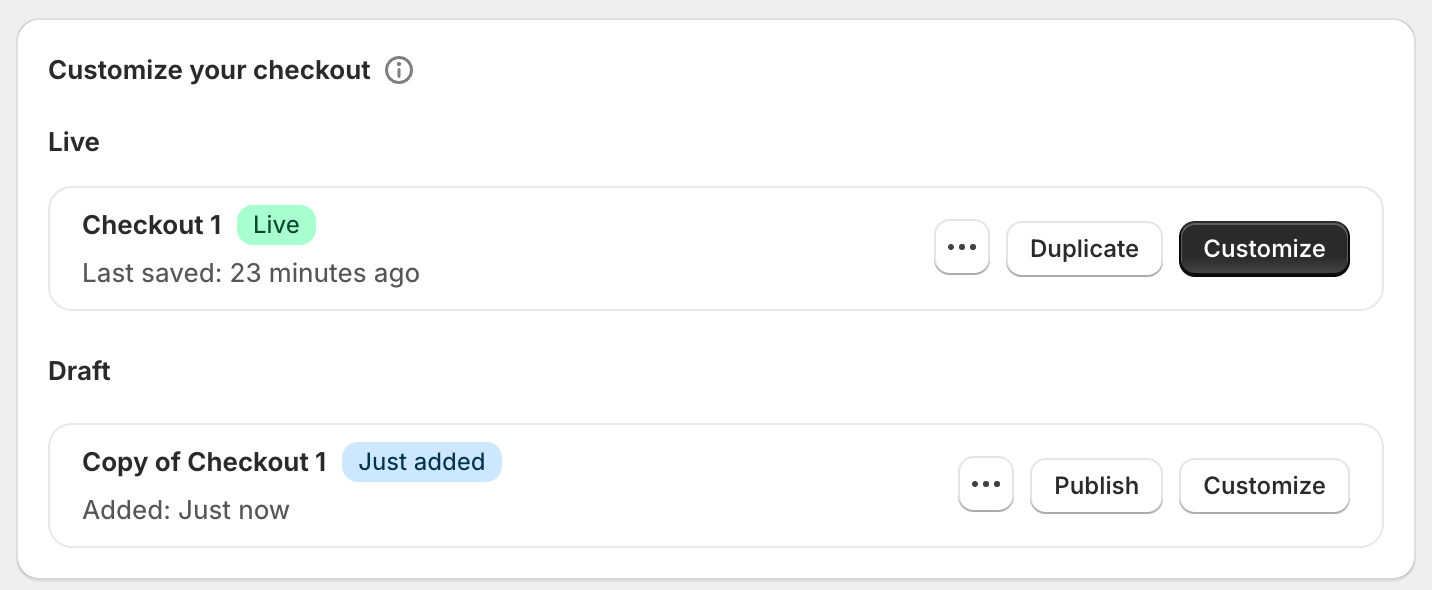
- In the Admin section of your Shopify Plus account, go to Settings > Checkout. From here you can either edit your existing checkout, or create a new draft of your checkout layou
-
To edit your existing checkout click the Customize button, or to create a new draft checkout click the Duplicate button
followed by Customize on the new version
-
Once you’re editing your checkout, go to the Settings menu (the cog icon on the left-hand side), scroll down to the
Address autocompletion section and select the Loqate option to set Loqate as your provider:
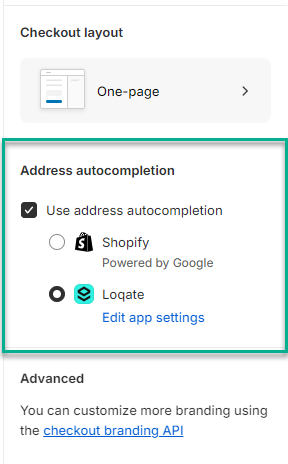
- Make sure you save the changes to your checkout, then exit the editor. If you created a new checkout draft, you can click the Publish button to make it live
Recommended - Include company name
By default, Shopify is set to not include a Company name address field. As such, if an address includes a company name (for example if a customer orders a delivery to their place of work) it won’t be included in the address that’s populated in Shopify. We recommend setting Shopify to include Company name as an optional address field, so that it will be populated any time an address does include a company name. Here’s how to change that setting:- Go to the site Settings page for your Shopify store
- Select the Checkout option from the left-hand menu
- Scroll down to the Customer information section
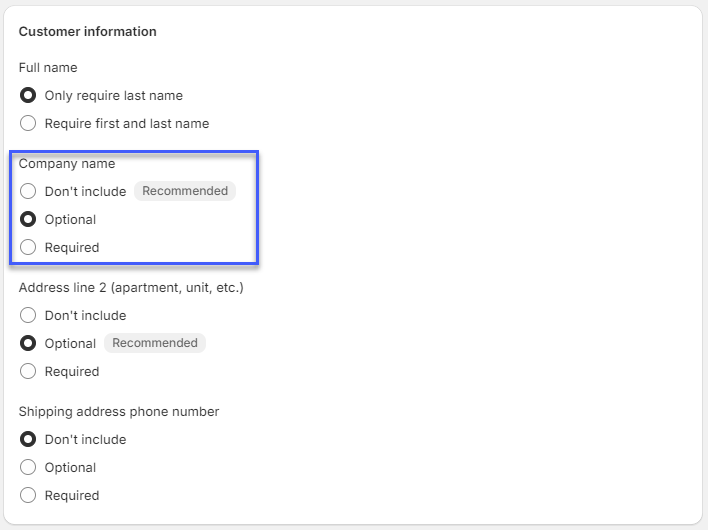
- Set Company name to Optional, then click the Save button
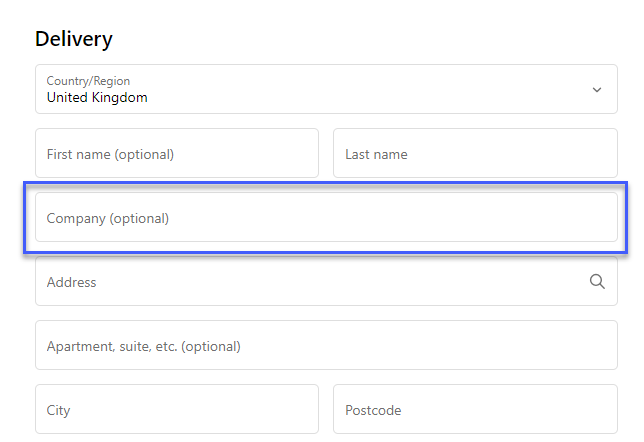
Optional - Use without Address Capture (not recommended)
We recommend always using Address Capture, as this helps reduce the chances of mistakes caused by manual address entry, ensuring addresses can be trusted as correct and giving the best customer experience. It is, however, possible to use just Address Verification or just Email Validation if you don’t want any kind of address autocompletion functionality. If you want to use Address Verification and/or Email Validation on their own, follow the full installation and setup process as above, then you can manually disable Address Capture. Here’s how to do that:- First, make sure that you’ve enabled at least one of Address Verification and/or Email Validation (see the Enabling Loqate services section earlier)
- Then, go to Settings > checkout and click the Customize option for your checkout
- Click on the Settings icon on the left-hand side, then scroll down to the Address autocompletion section
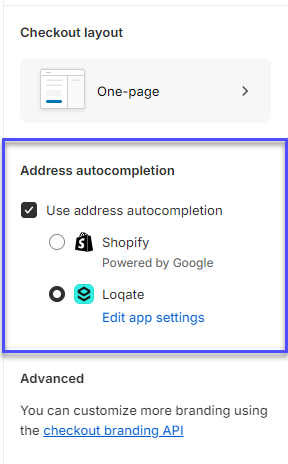
- Untick the Use address autocompletion option, then save the change to your Checkout configuration
Optional - Advanced Settings
The Advanced Settings page is located in the Admin section of your Loqate app, and includes the following optional settings.Display a custom Loqate capture address search input on the checkout page
Display a custom Loqate capture address search input on the checkout page
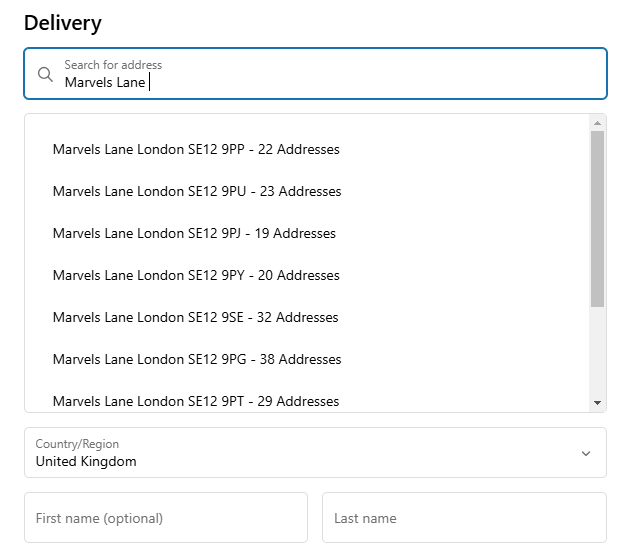
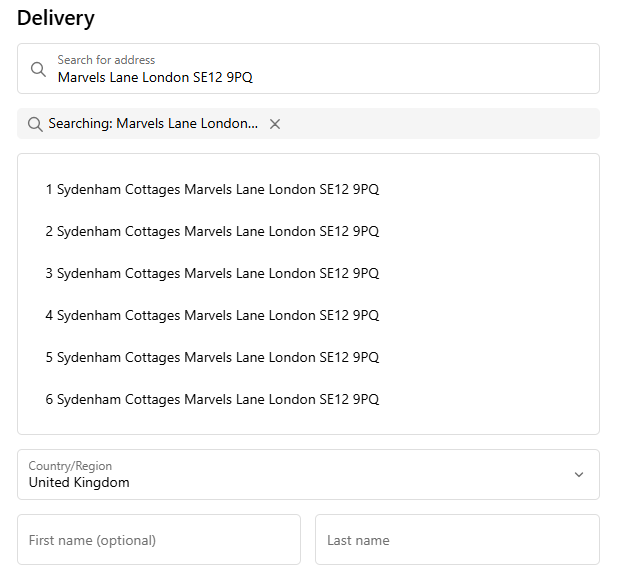
Force addresses to be returned in latin character sets where available
Force addresses to be returned in latin character sets where available
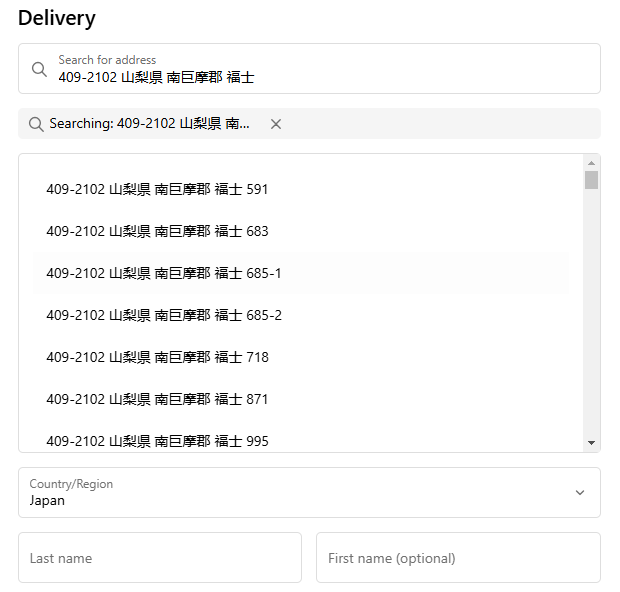
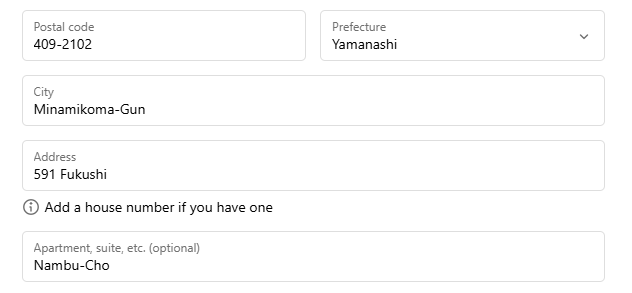
Use address capture to allow customers to update their address if the shipping address cannot be verified
Use address capture to allow customers to update their address if the shipping address cannot be verified
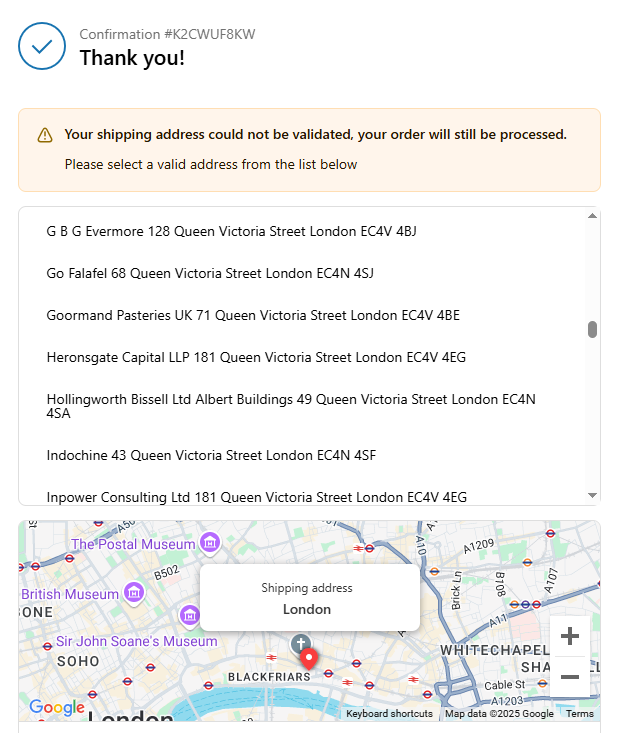
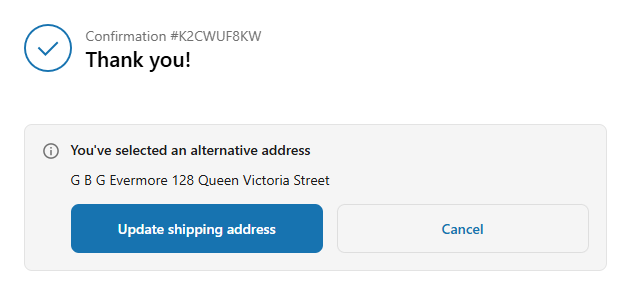
Use enhanced country validation on unverified addresses
Use enhanced country validation on unverified addresses
Troubleshooting
I can't see some of the Admin options described in this guide
I can't see some of the Admin options described in this guide
The Capture autocomplete field is not showing on my checkout
The Capture autocomplete field is not showing on my checkout
When selecting an address, the fields do not populate
When selecting an address, the fields do not populate
How do I uninstall the Loqate app?
How do I uninstall the Loqate app?
